Entry Form Configuration
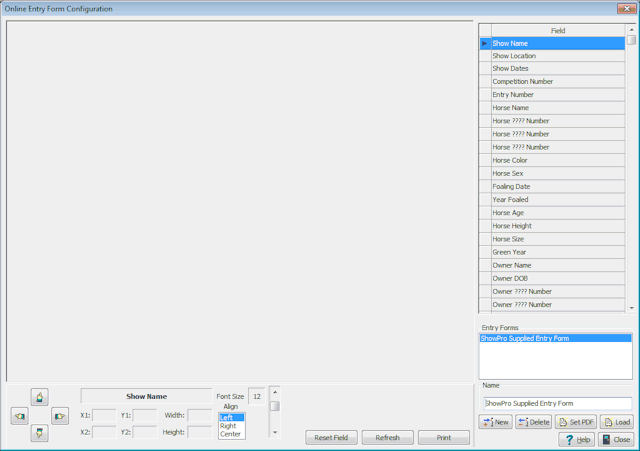
If you're going to receive entries electronically there has to be a way to get those entries onto your entry form. We provide a tool that allows you to configure just about any entry form for use with the Horseshowing.com online entry system. ShowPro comes with a preconfigured entry form that is actually quite nice that you can use as is. This entry form is also provided as a Word document so that you can modify it if you like. When you select Data > Horseshowing.com > Entry Form Configuration the following dialog box is displayed... |

Notice there are some buttons there at the bottom right - New, Delete, Set PDF, and Load... |
|
|
Click New to create a new entry form that can be selected for use for online entry. This will create a new entry in the list and you can edit the name to suit. |
|
Click Delete to remove the selected entry form from the list. You would use this if you no longer wanted to use the selected entry form. |
|
Click Set PDF to associate a PDF document with the entry form. This is your blank entry form, you will navigate to and open the PDF file to make the association. |
|
Click Load to load the entry blank and any configuration that has been done. |
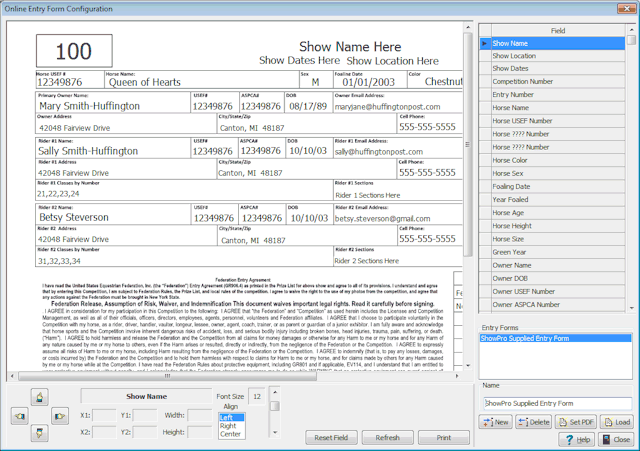
This is a loaded, fully configured entry form....

Now lets zoom in on some things... |
||
|
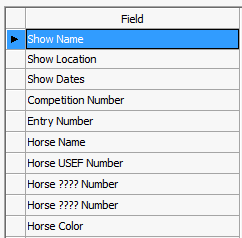
Notice that along the right hand side there is a list of items that you might want to place on your entry form. Whichever item is selected is the item that you're currently working with. If you don't need a particular item you can just skip over it and ignore it. Notice that there is a Horse USEF Number and some ???? Numbers. Actually the USEF Number started out as a ???? Number too. When you click on a Number field a special Set Org button appears near the bottom that allows you to associate an organization with a Number field, this is how the first Horse ???? field became a USEF Number. The same principle applies for people numbers for which you'll see you have several sets. Setting the orgs for your numbers is one of the first tasks you need to perform. |
|
Now, you're going to be clicking and dragging the mouse to draw/define the box where you want the selected field placed. As you draw your box the font size (below) will be adjusted dynamically and you'll see some of the other info updating as well. |
||

Once you've drawn your box you can use the arrow buttons, the Align, and the Font Size to fine tune it if need be. The Reset Field button removes the configuration for the currently selected item and allows you to start over if you want. The Refresh repaints the entire form. If you hold down the shift key while clicking the arrow buttons the movement will be magnified by a factor of 10. |
||
|
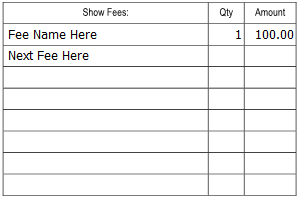
There are a few other little items we need to talk about, one is fees. To the left is a typical fee configuration. There is a Fee Name, a Quantity, and an Amount. These are placed just like typical fields, nothing special. The special thing is the Next Fee Here field which really isn't a field at all but rather something that identifies what the proper spacing of the subsequent fees should be. |
|
Another bit of special handling concerns the classes and sections boxes. These boxes can be a long single line or they can be a shorter multi-line box and the text will wrap around within the box. For sections the box should be a minimum width of what the longest single section name might be and the height, if you plan on having the section names wrap to the next line should be high enough to allow for this. When you draw both the classes and the sections boxes the font will lock in at the smallest size, this is because the odds are good that this is the size that would be needed anyway and to allow any wrap around to happen properly. |
||
Note: Sections are a Hunter Jumper thing, if you're not doing Hunter Jumper shows you won't have sections on your entry blank. |
||
With not much effort you can configure your entry forms to work with the Horseshowing.com Online Entry System. |
||

