Check Out
To check out an entry or entries select Check Out from the File menu or press F5 and the entry check out screen will be displayed... |
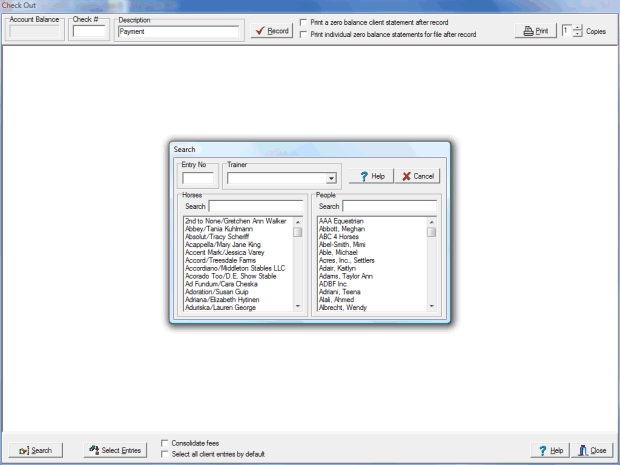
The entry search box is displayed so that you can search for the entry that you want to check out. Once you have selected an entry the statement for that entry will be pulled up in the statement viewer... |
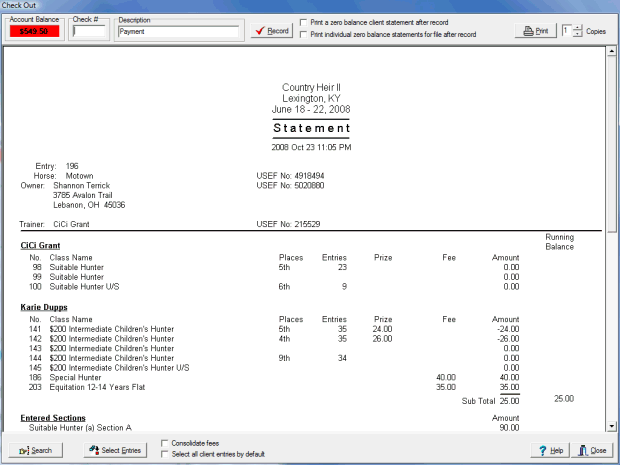
There are a number of preferences that you can set that affect the operation of check out and the functionality can be fairly dramatically altered by these settings. So it is important for you discover which options you want set to get the type of checkout that you desire. Once you have your options set ShowPro will remember them and check out will operate according to your wishes as its default behavior. You also have the flexibility to use any of the special options on a per case basis. Basic Check Out |
|||||||
|
Once you have searched for you entry and have your statement in the viewer the cursor will be positioned in the check number box. If you type in the check number and press Enter a payment will be posted, the balance will be taken to zero, and the statement in the viewer will be updated. Pressing Enter in the check number box is a short cut, it is equivalent to pressing the Record button. |
||||||
|
The Description field defaults to "Payment" which may be sufficient in most cases but you have the flexibility to set the description to anything that suits your purpose. |
||||||
|
If you didn't take the short cut by pressing Enter in the check number box you must click the Record button or press ALT/R. This will post the payment and refresh the statement. |
||||||
|
Check the box at the left if you want ShowPro to print a zero balance statement after the payment is recorded. Most shows staple a zero balance statement to entry form, checking the box automates this for you. |
||||||
|
ShowPro has the ability to combine statements from several entries into one which will be covered below. Checking the box to the left causes the zero balance statements to be printed out individually even though they were combined into one. This allows you to still staple a zero balance statement to each individual entry. |
||||||
|
At any time you can send what you have in your viewer to the printer by clicking the Print button or by pressing ALT/P. You can specify the number of copies to print. |
||||||
That covers the basic fundamentals of check out. Next we'll cover the functions that allow you to combine multiple statements into one and the option that you use to control how that is done. Checking Out Multiple Entries |
|||||||
|
To check out multiple bills on one statement your first step is to select the entries to be combined, to do this click the Select Entries button or press ALT/E. |
||||||
|
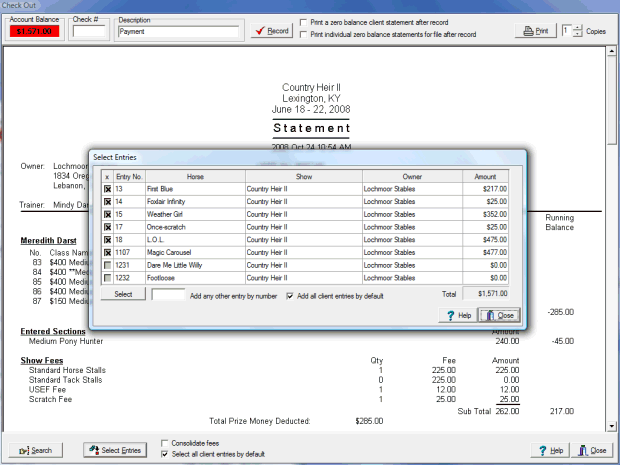
Before you do that though you need to be aware that the check box to the left will potentially have a big affect on the outcome. If the box is checked all the bills for all the entries with horses owned by the same person as is on the selected entry will automatically be added into the bill. This includes any entries in the current show and any entries for shows selected for other balances. For example you might see something like this... |
||||||
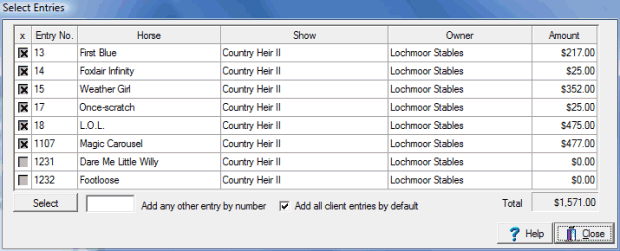
Every entry with a horse owned by Lochmoor Stables has been combined into one statement. You can remove an entry by unchecking the box in the first column of the table. As you change the selection status of entries the total amount will change to reflect the new amount due
You can add any entry you want by typing the entry number into the Add any other entry by number box and pressing Enter. If the Add all client entries by default box is checked all entries related by the owner of the horse of the entry whose number you entered will be added also. Depending on your situation this may or may not be what you want - again, as mentioned earlier, you need to set the check boxes to get the desired outcome. The default checked state of the Add all client entries by default check box follows the checked state of the Select all client entries by default check box at the bottom of the statement viewer - if it's checked this box will be checked when the Select Entries dialog opens otherwise it will not be checked. Now if the Add all client entries by default check box is not checked then you're only going to get the single entry that you currently have selected... |
|||||||
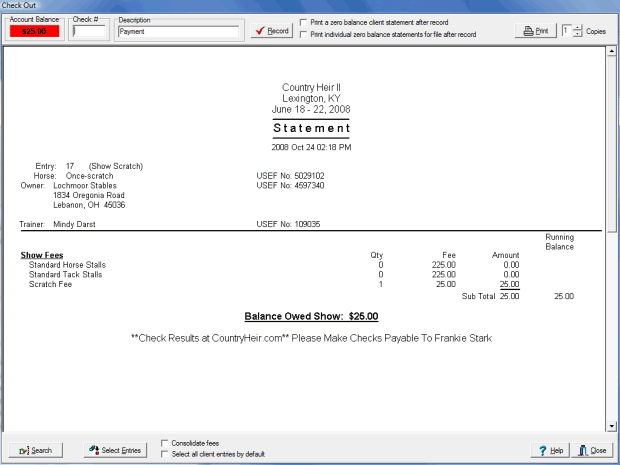
...which very well may be exactly what you want. The check out feature is very powerful but can also be very simple. |
||
|
The Consolidate Fees check box allows you to, when you combine statements, to specify whether fees should be grouped together and listed at the end of the statement or be left broken out in the section for each entry. If someone has 10 horses chances are it makes sense to consolidate the fees but maybe not. In any case you have control over this. |
|
Note: There is also a capability to check out multiple entries through the trainer accounts. If a trainer is paying the bill for some or all of their clients the best place to do it is through the trainer account. |
||
See Also |
